0:02 How long have you owned the vehicle, Ford, do you know? Two years, three years. Two or three years. So the problem is under there, surprisingly enough. How long have you had it put, how long did you notice it? So we've noticed it for about 18 months. We've checked all the seals; all the seals look fine.
0:26 We've rotted and drained the sunroof. Yeah. And it waked up a little bit. It was fine, but then it started again. Started again. So whether we've dislodged, it's been in two garages that have said they've looked at it, but clearly they haven't. Oh, okay. But when it's heavily raining, whether you're driving it or not, it becomes a bit of a swimming pool under there.
0:50 Yeah, I mean that's understandable, because it's such a low point in the car. Yeah. If you're going for it, it's gonna reach back there. So obviously it's a little slow. But there's never any water on the other side. Okay. Ever the driver's side. So the garage you went to, did they say they'd unblocked them or anything?
1:06 Were they unblocked? We unblocked them. We did it at home, we unblocked them. And to be fair, when we sealed the sunroof we put a little bit of masking tape over it to see where. That helped a little bit. Okay. So that's why we think it was probably the sunroof, but you guys all know better than me.
1:26 It's part of our test, it's all right, it's what we do. But I've tried to keep it as dry as I can. Yep, because obviously I use it every day. Yeah. No, you don't want mould building up in it. It's only this side then? It hasn't situated on the other side and it's dry, isn't it? So it goes in the driver's spot well as well. Yeah, but it's only ever this side. Okay. You say, were you unblocked the drains, did it sort of help? Or did it a little bit, but there's no sort of
2:15 run marks. Okay. What about, like, electrical force, you got any, like, sort of, is your airbags all working? Yeah, everything's working fine. The engine's all fine, yeah, there's no problems. We did think there might be a little bit of parasitic drain at some point, because the battery kept saying low battery. Okay, I'll get you.
2:38 But I don't know if that's because quite often I have it on the fan on high, to try and keep the inside of the car dry as well. And does that work when you have the fan on? It doesn't get more wet? No. So it's not, it couldn't be like the aircon or something like that?
2:51 So I don't believe it's anything like that. It's literally only when it rains. In the summer, it's dry. Yeah, it gets that season, doesn't it, when it starts piddling down and it starts getting all wet, doesn't it. That's alright, that's alright. As you can see, I've had a bit of trim up, just sort of.
3:09 Yep, that's in the boot. And I'm hoping you can put my carpets back in properly. Yep. Because all up here, it's crumpled up. All the carpets crumpled underneath. I've tried to put it up, that's why I had the double back tape there, that's me. That's alright, we can sort it out. Alright, no worries.
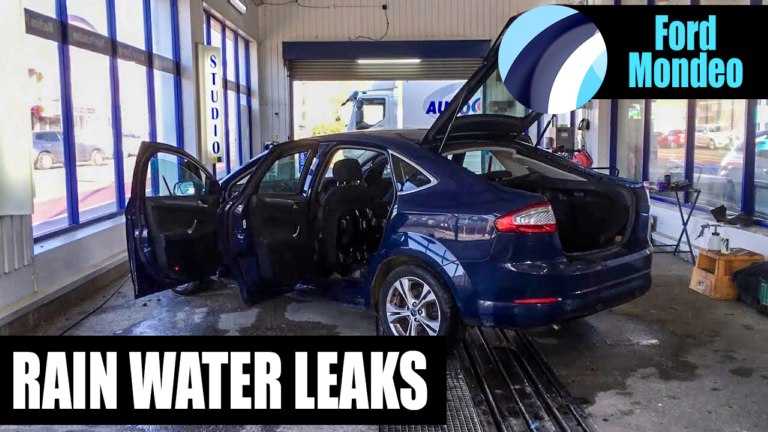
3:29 I mean, is there anything else you want to do with it, or do you just want it fixed? Just want it fixed? Yeah, that's alright. And then obviously the carpet's all cleaned and put back. We're just about to begin our 28. Okay, so today we've got a Ford Mondeo in for a water leak.
4:33 Customers are finding water in the rear footwell, and they've actually lifted up the carpet a few places. If we just put our moisture tester in the front, it's absolutely soaking in the front. We've done that the other side as well. Not that particularly in the passenger front, but it is a little bit down passenger rear as well. So what we'd need to do: lift the seats out, lift all the carpet up, all the trim out and everything like that, and get it all nice and dry. Obviously you've
5:01 got electric bits on the seats and stuff which will plug in underneath, so it's important to get it all dried out so you don't have any electrical issues going forward at all. Also the possibility of mould can obviously increase with obviously damping the car, so it's important to get it all dried out. So, just go around the vehicle and demonstrate what we have found so far. So first things first: this door rubber is actually being put in the wrong place. So the joint should be at the bottom, but for whatever reason it's been joined just there. And if I
5:38 come around to the passenger side real quick, the join, if we see, is actually around here. But on that side it's been pushed over, so that needs to come off and be resealed in the correct place. Just because otherwise it does allow water to trickle down this B pillar off the roof, and then it can actually get behind this rubber. So that's why they tuck it down there, where it's a little bit more protected. And the second thing is, if I close this door, is the actual
6:12 door membrane itself. Again, quite common thing on this particular make and model of vehicle. So if I just pour some water down here now, what it should do is drain out the drainage holes at the side. However, we come inside the vehicle, we can see lots of drips all the way along. And should just be draining out the two holes at there, but a lot of drips. And that is what is then causing all the water to get into the foot well, and then obviously into the back of it
6:42 as well. The other sides are showing slight signs of leaking, but nowhere near as heavy as the drivers. So what we need to do: take the door cards off on each one and then reseal the membrane. If the membrane is still obviously intact and in one piece, get it all resealed and put it all back together. The other bit is the sunroof pipes. Now, they're not completely blocked, but they are backing up still, and there's a fair bit of dirt and grime in the cassette itself. So what we'll quite again
7:14 is to get those all cleaned out and flushed. And we'll basically put a chemical solution down there that will help to dissolve any silt or anything like that that can be built up over time. So that again we will do. Just wanted to note the screen doesn't show any signs of leaking at the moment. We've lifted this bit of trim off that side to do our testing, and that's all fine, clips back in. But passenger side we have noted that there isn't one there at all, or yeah, it's just missing. So it shouldn't cause an issue from a water point of view,
7:53 but obviously it is, you know, on there, so it is opening that up as well. So just wanted to show you that that is missing on the car. We'll now go around to the back of the vehicle and show you what else we have found. Okay, so now we're at the back of the vehicle, and we've poured water down the gap here.
8:11 Got a little twisty camera going into the box section there. We can see drops of water starting to form here. That's obviously the rear air vent. That's the same both sides. They are very common on these particular make and model. So what we do: take the bumper off, take the lights out, and take the vents out.
8:29 We then get brand new vents, pop those in and obviously get it all resealed. Last other thing is the rear tailgate rubber is loose. That all needs to be in place correctly. Centre line should be in the centre line of the lock as well. So it would indicate it's maybe been off in the past, same as up here, but obviously it's all been unhooked at some point in its life.
8:52 So that all needs to come off and be resealed as well. Obviously that's everything in the car. What we'll do, we'll put it all in an estimate for you. So that'll be in an email separately. Have a little look through that, and then yeah, give us a call if you're happy for us to go through with the work.
9:07 Okay, just a quick update video for you. So we've got the driver's side all dried out. Just putting that back together now. We've replaced a lot of the clips that were all broken, so we've been replacing those with new ones as we've been going through. So they're all new ones. So this trim and everything is back in, obviously.
9:29 We've put it back in the best we can. We didn't take some of this trim out so it's not clicking back in perfectly, but it's clicked into the main bit. It's just obviously where it's been previously taken apart, some of the clips have misaligned a little bit. The carpet itself, we've put it back down best we can.
9:49 I think because obviously it had been wet and had been sort of folded up for quite some time, it's actually stretched the carpet in places, because it's quite thin carpet. So it has sort of stretched the fabric a little bit. So it's not sitting completely as I'd like it to. But unfortunately I haven't really got much other choice.
10:09 Obviously it will be better once the seat's back in. And again, we've tucked all of that back around the trim as best we can, but there is still a bit of a ruffle in the carpet. We just can't get rid of it, unfortunately. So it's all tucked up where it needs to be.
10:22 I think it's just where it's been played with and lifted in the past. Unfortunately, that is just the case with these carpets. Still got the passenger side of the carpet. We've just folded that down just to get this side all wrapped in. That side's still got a little bit of drying left to do.
10:39 And then obviously we've got things like seat bolts and everything to go back in it. We have got the air vents for the rear lights. We're just waiting on some clips for the rear lights that we need to reseal. Unfortunately, there is a bit of delay on these at the moment. So we, I believe they're waiting up to 10 days for those.
11:01 But obviously, we're trying to hurry those along, trying to find a quick alternative if we can get them for anywhere else. But yeah, just wanted to give you an update, basically saying carpet's going back down. However, we're laying it as best as we can with what we've got. Just to add onto the video: obviously the door membranes are all being taken off.
11:21 We're just working our way through them at the moment. We've got three of the door membrane replacements have arrived. One of them does appear to be on back order. They've told us up to 10 days, but obviously as soon as we get that in, we'll get that all fitted. New rear air vents, they've all gone in as well.
11:39 The old ones are all been taken away, but you've got your new ones in there as well. So we're getting along with it nicely. So obviously the vehicle's been under the rain arch. It is all come back nice and dry. It's all back together now. So that's all good. Given inside the boot, a bit of a courtesy hoover as well.
12:06 Just to tidy that up. But all of that is all obviously back together, and drive the side nice and dry. So obviously your vehicle just needs to go out now, have its real world test. And by that we mean go around, drive as normal, and just check those areas that you were finding water. We normally have the first few heavy rain pours. We put a spray wax on it as well for you, just to tidy the car up. But yeah, apart from that, cart is all ready to come collect.
12:41 It's just one of the drivers. Yeah, so it's behind the drivers door. Where it was before. And found water anywhere else at all? Yeah, that is wet isn't it? Oh yes! It's no different to what it was when I first pulled it. It still is wet. And have you seen any sort of like drip marks or anything like that?
13:27 literally just like before. Okay, all right, no worries. Nothing in the boot or anything like that at all? Just this area. Yeah. Yeah, of course, no, I totally understand the first creation. Okay. Oh yeah, so it's in exactly the same place as it was before. All right, as I say, what we'll do, we'll go through all of our tests and everything like that, yeah, and just go from that point as to, yeah, if it's something that we've repaired that's failed. And then if it is, obviously we'll go down that route. If it's, if we've checked everything and
14:36 it's not, we'll still make you a video showing you what we've done and everything like that, and then we'll go down that. So let's say all your repairs are fine, how will you go about finding the leak now? So it will be more, so let's pop out the break and start over.
14:50 So our colleagues are going to pour some water down this dorm end main, and as you can see we've come around this side, should be able to sort of see. We look on the leaf, we sort of see there that dripping started to occur, so you've got that drip there. So yeah, what we do is we get this one off. We think it's a clip, but yeah, there's only one way to find out, so we get this one off. This is the only one that's leaking, but yeah, we'll have a little look at this one. And that's all
15:36 also another thing that we found is these sunroof pipes appear to be blocked again. There's also more leave as well, as you can see over there underneath the scuttle. So whether this is part of under a tree or whatever it is, whatever, during the day, it seems to be clogged up again. And we've found it coming up out of this box section here, and then that's made its way into the under there as well.
16:06 That's on both sides. So yeah, what we'd have to do is we'd have to flush them again. Then yeah, make sure it's all nice and good. If, if not, we'll have a little look and see if the pipes need changing. Okay, so just a quick update for you. So we've removed the rear door membrane now, and what we have discovered is there aren't any clips that would have been removed previously, so that's not the problem for leaking. But there are these little clips here that are on there from factory, so
16:41 they are just a one clip pushing kind of clip. So we have seen that there is a bit of water dripping from one of these. What we'll do is we'll clean them up and we will just seal those to make sure that the water's not coming through those again. So I'm happy with our work here about the sealant in and around the membrane.
17:06 That's all good, nice and secured. But yeah, so we will put a bit of sealant around this. We'll give them a clean, sealant them up, make sure it doesn't leak again. We've also taken the front one off just to be sure that this one isn't leaking. But to just be happy, we're going to clean these ones up as well and just sealant those to get them nice and flush on there, and make sure that there's no leaks going on with that either.
17:37 Okay, so I just wanted to add another little video. Obviously guys have talked through these clips on here that were potentially causing us issues, but we weren't convinced that that was sort of the main issue. Now we've seen through our testing that the sunroof has been backing up, so I've taken off the A pullers just wanted to see what was going on with them. And as we can see, there is basically these little plastic holders that go all out but hold it. Now on this side and the passenger side, where they clip in, if I
18:12 just unclip it, they basically pinch the pipe. I'll show you on the other side as I've already pulled that side out. But what is happening, although we've flushed them in the past, the design of them looks to be quite poor. So as soon as you know any dirt or debris goes down them, it's just gonna pinch them again. So as you can see from that pipe, it's all squeezed and pinched there. So that you've got a pinch point within the pipe, that the water's going from your sunroof comes down here down your A-pillar, and it's basically
18:55 getting to there. A small amount will go through, but in heavy rain it's all going to be pinched and back up, comes up here and basically overflows, and then runs back down the inside of your plastic trim. I can gain access sort of my hand through here and past all of this. We can just about gain access that side. The other side we will need to take the glove box out in order to gain access to where they come down to. So obviously we're going to do
20:50 as much of it as we can free of charge. Obviously drying it all out, stripping it all out, the doors. We've decided that we're going to, we've done the others ones on the other side as well. They weren't leaking at all, but we just wanted peace of mind, so we've resealed those clips as well. They're a bit of an odd design, so they're clicked in by default at the factory, and you can't, you know, you can't get them out to seal them or anything without completely
21:13 breaking them. But they are sold with the actual door card itself, so it's a bit of a tricky one. So obviously it's a bit of a learning thing from our point of view, so we haven't charged to reseal any of that at all. The actual membrane itself, the new ones that we put in, all of the repair and seal on those have all been absolutely fine. It's just, as I say, these little clips here that caused the issue. With regards to the sunroof pipes, I personally
21:42 think, as I said, it would be the best option is to completely replace those fronts, because that's going to continue to cause issues. We can flush them through again, but it is only a matter a time with those pinch points before they start to have issues again. I would charge just two hours. I know it's what we've sort of previously said about further investigation work, just an hour for either side, just to basically take the old ones out. We'd have to take these out and hit
22:08 the handles and stuff like that. We would normally charge more hours, but as I said to you, I'm trying to, you know, try and keep the cost down for you. So just two hours, that's an hour for either side. If you want to let us know if you're happy for us to go ahead and do that. Or as I said, we can just flush them for you, wouldn't charge you to reflush them at all. But I think again it would only be a matter of time before they start to
22:31 back up again, just purely for design fault. But yeah, I believe by the looks of it they are probably the main culprit and for why you're getting the water back in, because I said when we tested it, it really was running quite heavily behind that plastic. So I think obviously with all the bad weather that we've had, it has just been overloading those pipes and then coming back inside. But yeah, give us a call, let us know what you would like us to do and we can go from there with it all.
22:56 Right, we've just did a little bit of more further testing just to make sure we're happy before we put the door card back on, and we've established that the seal around the edge there is actually leaking. You can see water dripping down and that is building up inside this rubber here. You can see all of that rubber, and that is then leaking behind the door card but actually travelling in front of the door membrane. So yet another leak. The door membrane is fine, but it looks like a seal up there. It's not anything I've ever
23:27 seen before. It's very very strange. It looks, as I say, like it's leaking through that that bolt there where I've got the torch on. But again, it's all part of the actual framework of the car. It's very very odd to see anything like that leak. But again, that would be, as I said, yet another leak on the vehicle. We'll try and get this one fixed as we go in, and just try and seal around it. But yeah, just wanted to document that that's actually a separate leak. We would have
24:00 still been given the same symptoms, that it would have been leaking out the bottom of the door cards and then obviously into the footwell. So that would have given the impression that obviously the door cards or the door membranes were leaking. So obviously all the other symptoms were the same previously. So it's not something we'd have ever been able to spot or find until we had got the door cards and door membranes all sorted.
24:24 But yeah, that's quite an obscure one, that's just leaking down there and yeah, inside the car. So we'll try and get it sorted for you whilst we've got the vehicle. But yeah, just wanted to show you yet another leak. Right, just to add onto the video that we just showed you, we've had a little look. Only way we believe we can fix it is to take the B pillar off completely. The only way to do that though is to take off quite a lot of this rubber section here, and then you've got a bolt top and
24:50 bottom and a clip. We believe it's either the clip or the bolt that's holding the pillar on, which is leaking through into this middle section and then down and in. But yeah, so it's going to be more work unfortunately, because we've got to take all of this trim off. We would normally charge two hours for it, but again trying to reduce the costs for what you're paying, so we would only charge an hour for this. Obviously I appreciate it is obviously more money on top of the two
25:15 hours that we'd already quoted. These sunroof pipes we have done. We'll get one just to show you what they look like, but we have put those all back in now, so they've all been completely rerun. And the old ones, which I've got here, that is your problem: is when it was basically running through and then got to this 90, well, this kink here, and then was blocking up. So that by factory is obviously over time just completely pinched and is your pinch point. So it's definitely worth replacing them. And so ours, we've run
25:49 them a slightly different route, so it's a, it's just more of a gradual slope down as opposed to yeah that pitch point. So yeah, what we'll do, as I say, we're proposing to take the trim off to then get to these bolts at the back, and then be able to take this whole panel off. But it's this whole piece and part of all of this and a little bit down here as well. As I said, so again trying to reduce cost for you as much as possible, but it is going to take us a while to do that. But yeah, if you want to
26:19 give us a call again just to discuss it, let us know if you're happy for us to do that extra hour, and hopefully we'll get that sorted for you. Okay, so the B pillar has just been taken off now. So what you can see is that I've put these little rubber grommets in here, because there weren't any in there to secure the B pillar in place, so this caused the water to come through these holes here as there was no fitting on the plastic trim. If I just show you this one here. So this is what's come off. So as you can see, that's the
26:58 plastic that goes into it, and there's no rubber seal or anything on either of those to prevent water coming through. There is also this seal around the pillar which possibly it's coming through that. And so what we'll do is we'll just seal that back up just to make sure it's all secured and everything. We also believe that the water is coming through these ones, if not these ones as well, so we'll just make sure that's all sealed up around there on both of these ones here, and then we'll fit that back
27:40 on and do further tests to ensure that it is fixed. Okay? Amazing!



Share this video