Bubble Testing

Quick answer: Bubble testing is a leak-diagnosis method where the car or a cavity is gently pressurised and a soapy solution is applied to suspect areas outside - escaping air creates visible bubbles at gaps in seals, seams and fittings, showing where water and wind are likely to get in.
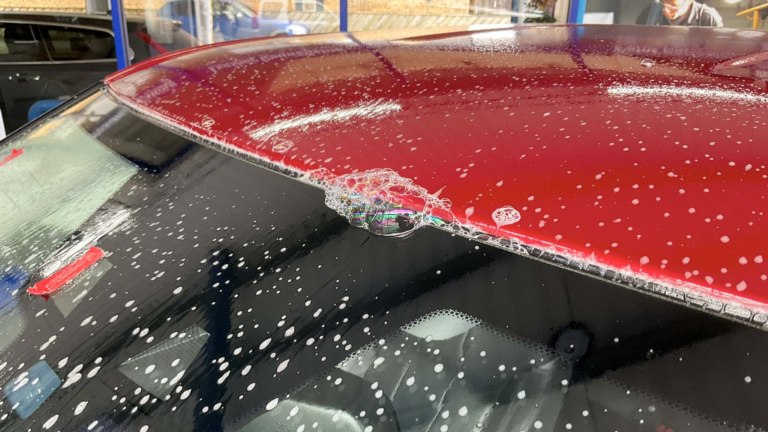
Bubble testing is a low-tech, but highly effective method of testing for leaks. Soapy water is applied over seams and joints, and then high-pressure air is blasted at the area from inside the car.
This will push bubbles into the soapy water, revealing the general area of the leak.
What it means
Bubble testing is a practical way to "see" leaks that would otherwise be invisible. The technician slightly pressurises the cabin or a localised area - for example with a fan in a window or a controlled smoke/air machine - and then applies a soapy water solution to seams, seals, vents and joints on the outside. Wherever there is a path for air to escape, the soap foams into bubbles. Those bubbles mark the exact points where water or wind can also find a route in when the car is in normal use.
Why it matters
Air escapes where water gets in. Very small gaps in sealant, membranes or vent housings may never drip visibly under a hose, but pressurise the car and the same gap produces a steady trail of bubbles. That turns an invisible fault into something you can point at.
It removes the guesswork that leads to bodged repairs. Rather than sealing every joint that looks plausible and hoping, bubble testing identifies which specific areas actually leak, so the repair is targeted and tidy instead of smeared across half the shell. Wind noise benefits from the same information, because the gaps that let water in are frequently the ones causing whistles and draughts.
Used alongside smoke testing, water testing and lifting the carpets, it fills in part of a picture no single test gives on its own.
When it beats a hose test
You will see bubble testing mentioned in leak-diagnosis reports and specialist estimates. Typical comments include bubble test around rear vents, bubbles seen at door membrane joint, bubble testing confirms leak path at screen corner or no bubbles seen around scuttle seams. It is especially common when chasing persistent leaks around doors, tailgates, vents and bonded glass, and when diagnosing wind noise complaints.
Context
Bubble testing is part of a structured approach to finding leaks. After gathering symptoms and doing visual checks, a specialist might pressurise the cabin, apply soapy solution to suspect areas - such as door membranes, rear vents, scuttle seams, lamp seals and glass edges - and watch for bubbles. Areas that bubble are then inspected, resealed or repaired, and the test is repeated to confirm success. It is important to use sensible pressure and proper equipment so that results are realistic and no damage is done to seals or trims. Bubble testing does not replace good understanding of drainage paths and body design, but it provides clear visual clues that make that understanding much easier to apply.
Common mistakes
- Using too much pressure, which can force air through routes that water would never realistically take, leading to confusing or misleading results.
- Only bubble testing a small area while ignoring other likely leak paths such as vents, membranes and bulkhead grommets.
- Seeing bubbles and immediately smearing sealant over the outside, instead of stripping and sealing joints properly from the correct side.
- Skipping a repeat bubble test after repairs, so secondary leak paths remain undetected until the car gets wet again.